Excel is a great tool to use when you’re making spreadsheets. And should keep your worksheet safe from others. So, how to protect a worksheet in excel? Don’tDon’t be far away here, and we will show you advanced excel tips to protect your worksheet.
You can protect a worksheet in multiple ways-
- Can protect using the password from file or review menu.
- Can protect specific cells or columns.
When you need those two protection methods and apply them, we will find all the answers in this article. So, keep reading-
You May Also Like: How to make a supply and demand graph in excel?
How to protect a worksheet using a password?
When you need to share your worksheet with others, how you can ensure your data or information will not be changed by others. Well, here is the solution. You can protect your worksheet by using a password.
Here we show the technique, how you can protect a worksheet using a password without opening your worksheet. So, open a blank worksheet and click the File menu.

Make sure you are on the info panel. Click the protect workbook and see there are multiple options. Now click Encrypt with Password option.

On your screen, show a dialog box of Encrypt Document. Enter a password and click ok.
Again show a confirm password dialog box. Enter your password and click the ok button.


Whenever you want to open your worksheet, you have to put your password.

How to protect a worksheet using a password from the worksheet?
Suppose you want to access your worksheet by ensuring that no sheet is added or deleted. Then these tips will help you share your worksheet with limited access. Go to the Review tab and click the protect workbook section. Here it shows a protected structure and windows. Input your password and click ok.

Again show a confirm password box. Input your password and click the ok button.

After setting the password, you can see your worksheet, and no one can add or remove any sheet. Now your worksheet is completely protected.

How to unprotect a worksheet in excel?
If you want to unprotect your worksheet, go to the review tab again and click the protect workbook. Here is the unprotect worksheet dialog box. Just input the password and click ok.

How to protect specific cells of a worksheet in excel?
Here we already know how to protect a worksheet. Now we know an advanced technique to protect specific cells of a worksheet in excel. Go to the Review menu and click protect sheet and show a box.

Here you see lots of options. Make sure to allow the select locked cells.

Click ok. And confirm the password.


Now no one can’t change a cell in your worksheet. When anyone clicks any cell for doing change, the below message will shown.

If you want to unprotect your cell, click again the protect sheet. Here you will see an unprotected sheet box. Just put the password and click ok.

How to protect a worksheet without a specific column in excel?
Suppose you want to share a worksheet with your employees and edit a specific column. Then this technique will help you. Here we show an example-
The image below shows a worksheet with little data. Here I will protect my whole worksheet without a column. First, I select the Value column.
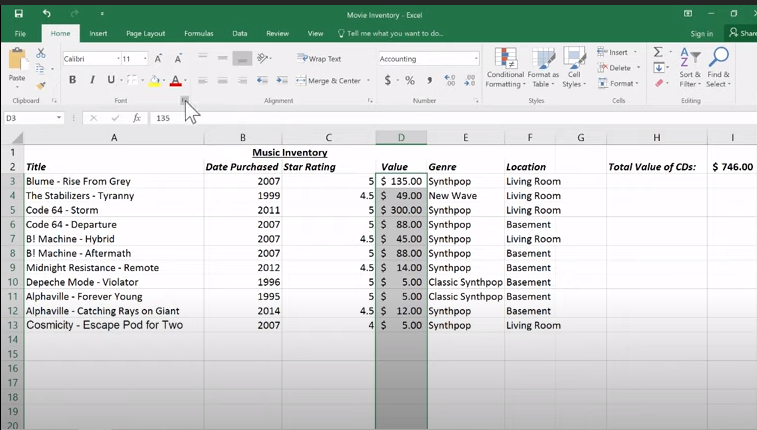
Now click on the mark section, and there will show a Format cells dialog box.
Here you choose the protection tab and see two options. Locked and Hidden. In every excel worksheet book there manually select the locked option. So, unselect the locked option and click ok.

How to Protect a Worksheet in Excel? Video Guide
References: